Maps of Magnamund
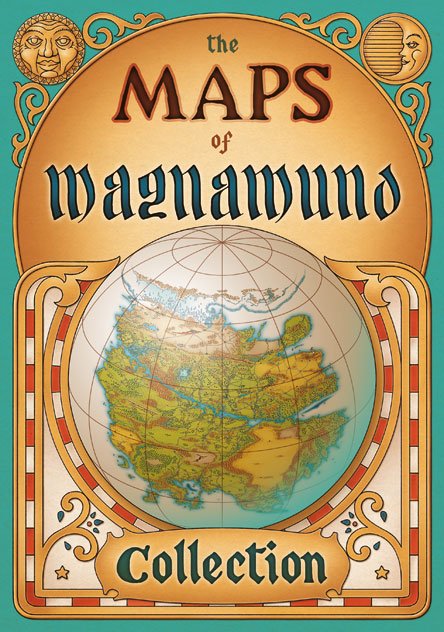
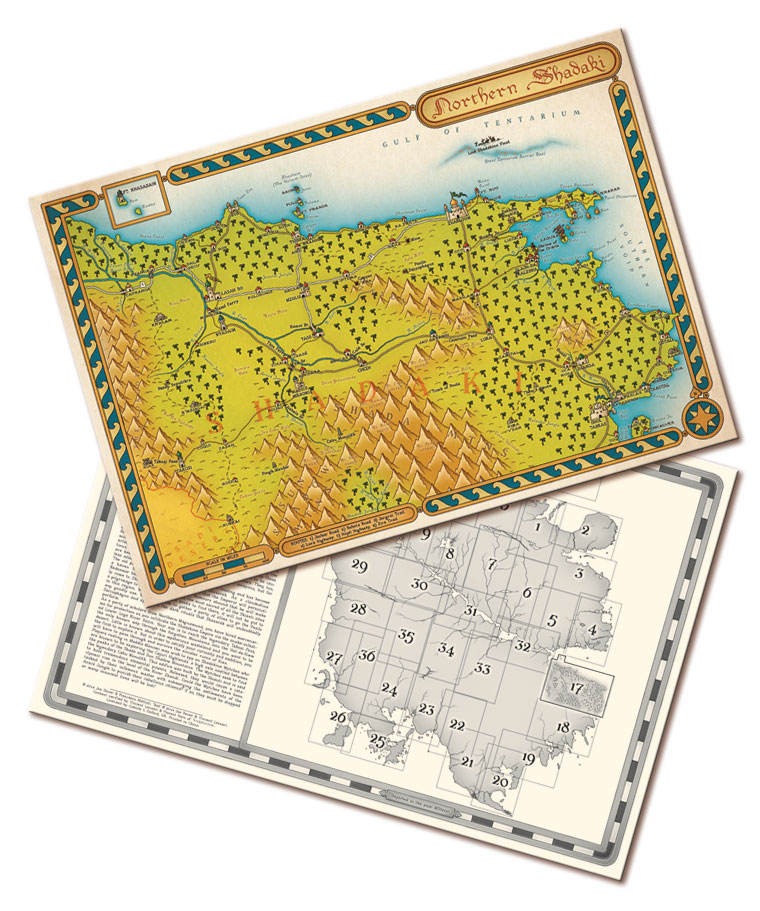
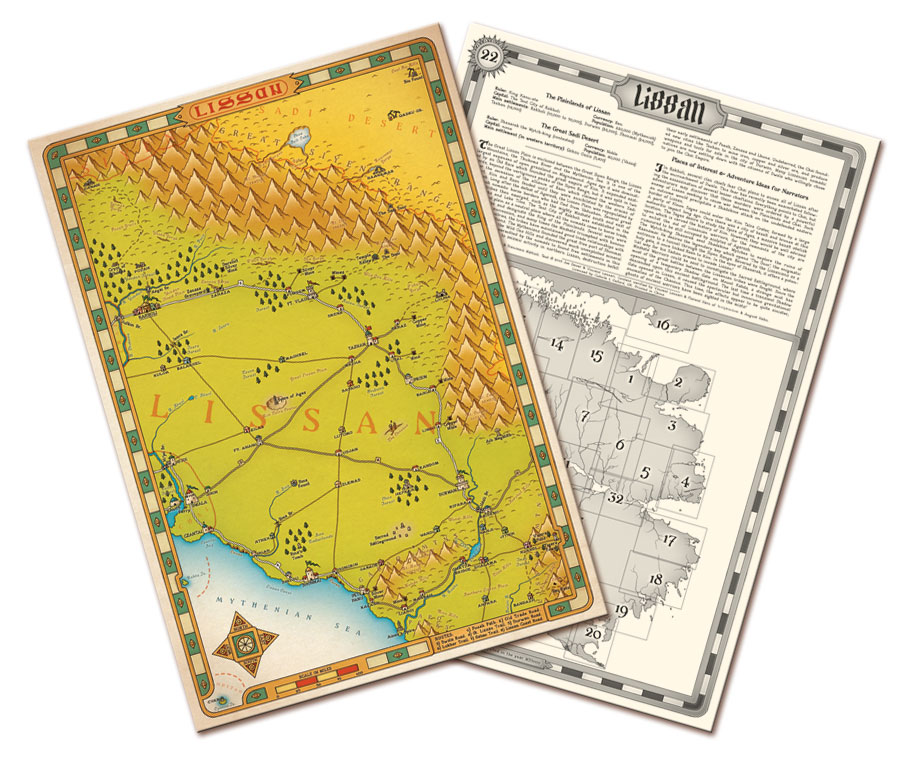
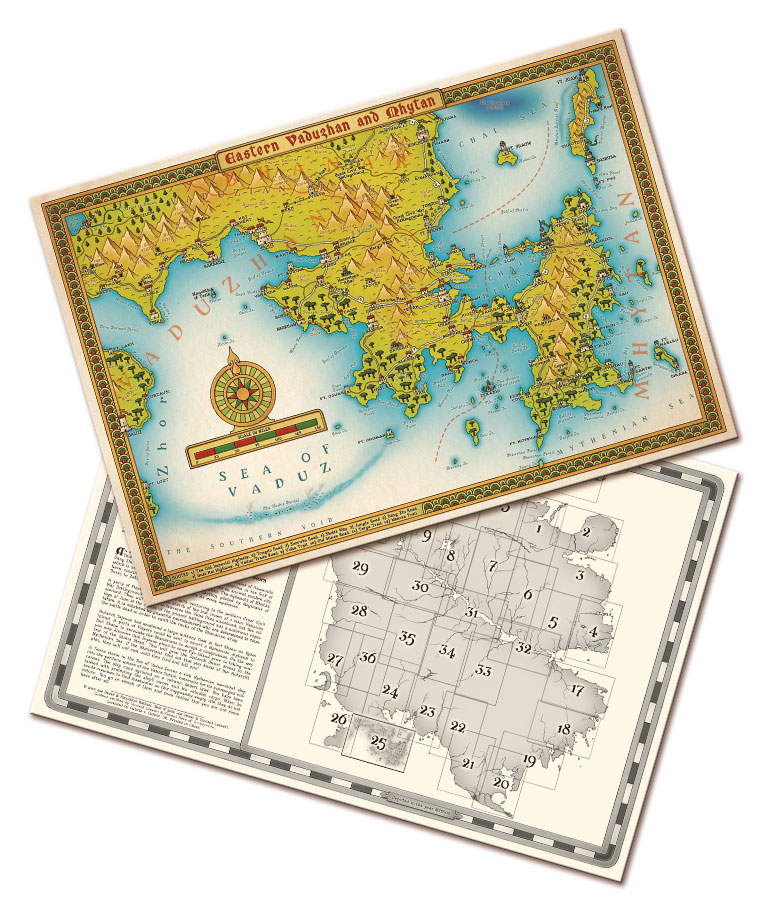
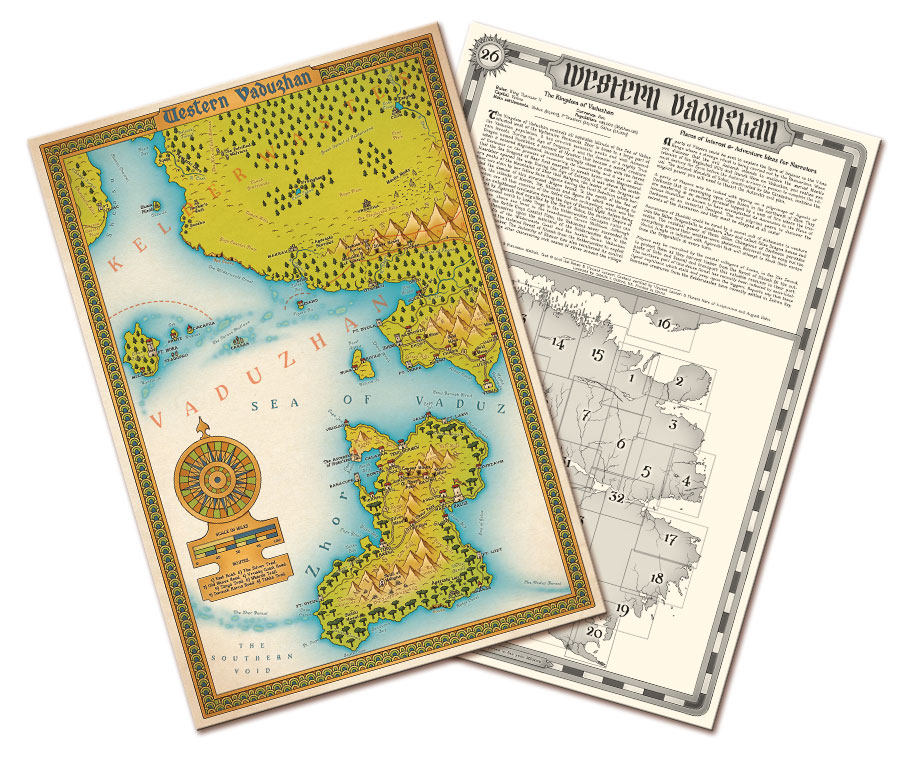
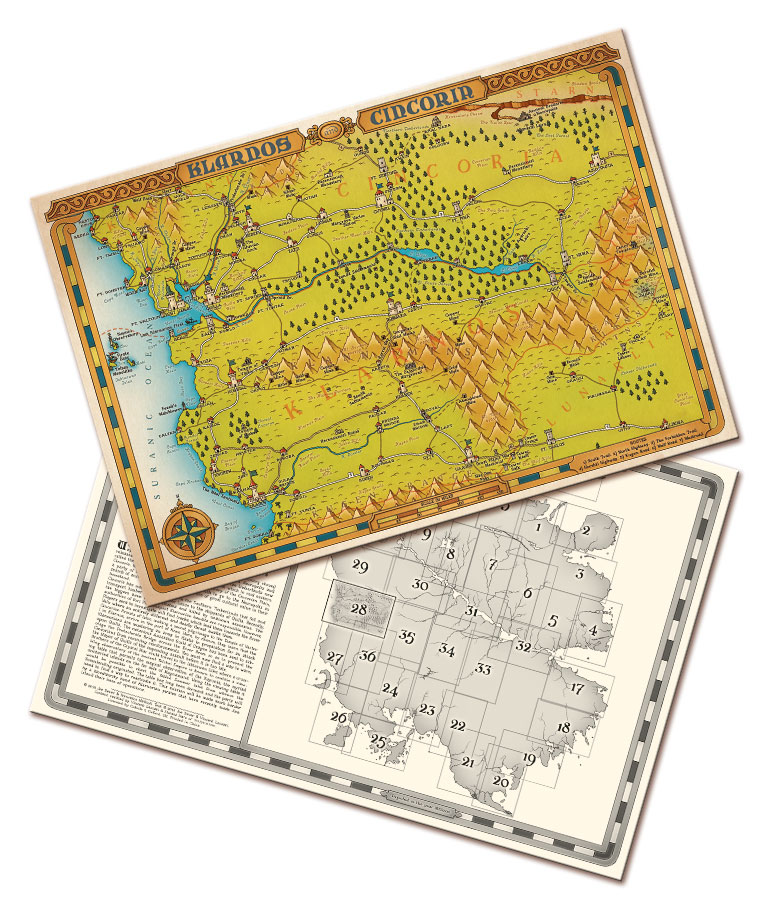
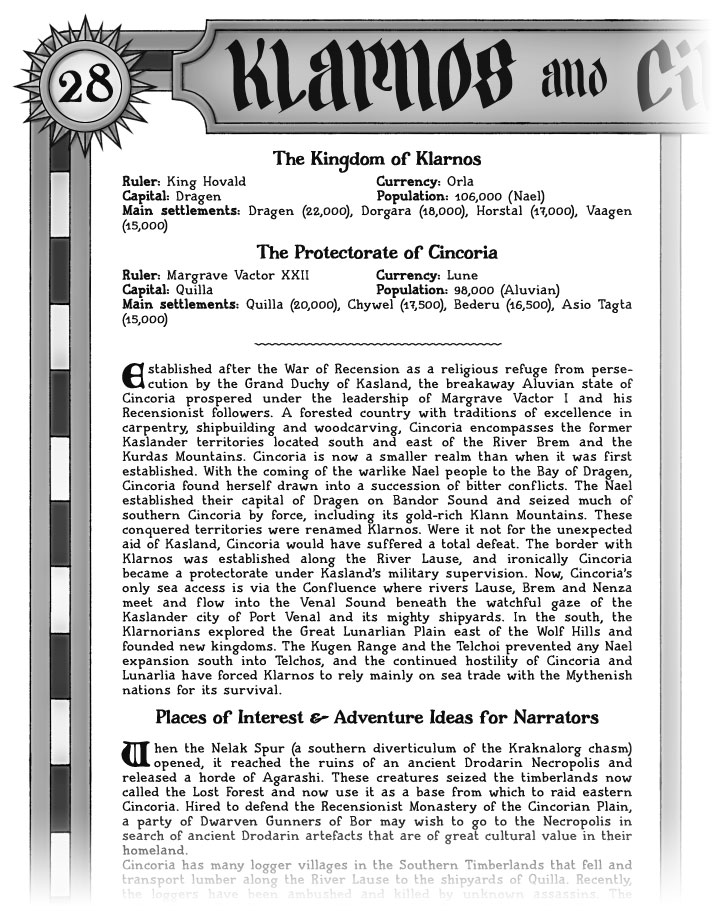
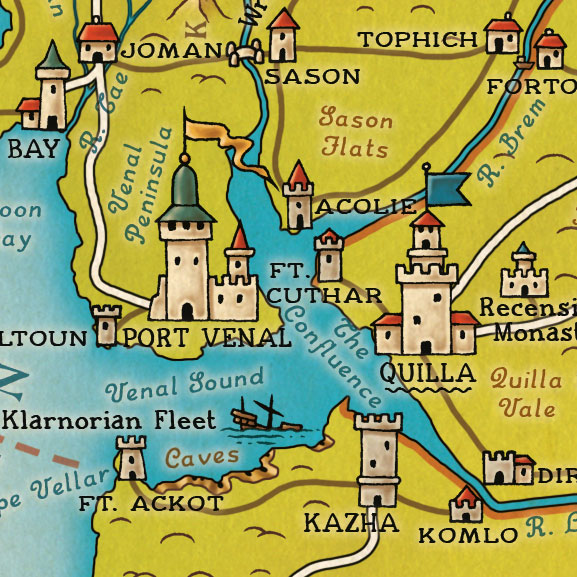
The Maps of Magnamund collection comprise 36 detailed colour maps of the world of Magnamund, produced in nine sets of four maps. Illustrated by Francesco Mattioli, they combine exquisitely intricate maps on the front with a world grid and useful background information on the reverse. They cover many previously uncharted geographic features, plus special sites and locations never before revealed. They also contain scenario seeds for the Lone Wolf Adventure Game. They are licensed and sold by Cubicle 7 Entertainment Ltd., the company that publishes the Lone Wolf Adventure Game.
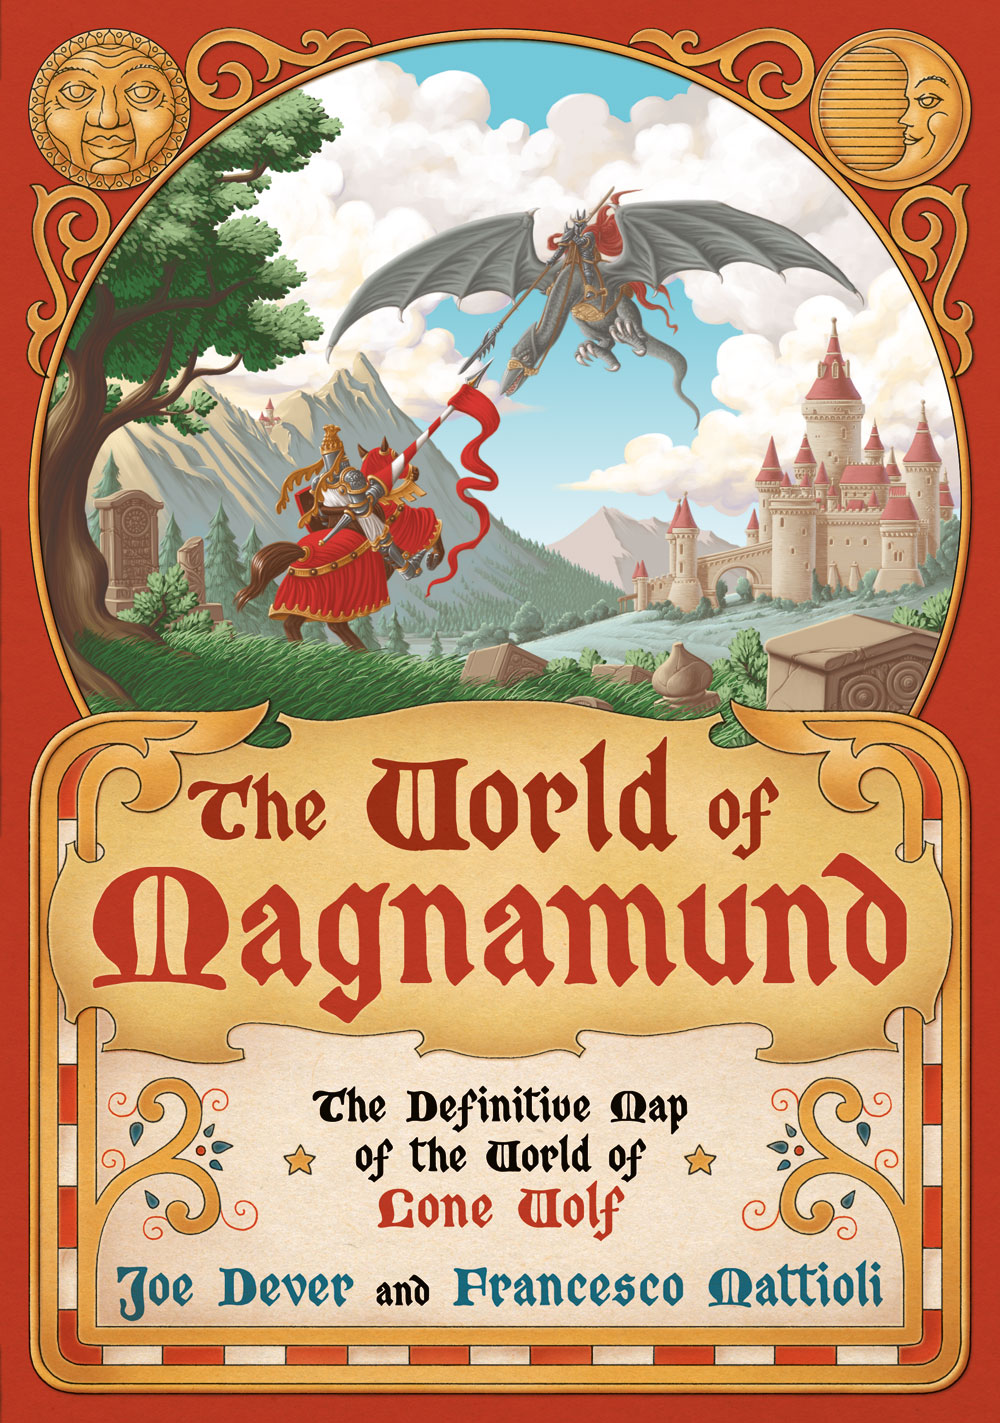
The World of Magnamund map is a large 700mm × 1000mm poster covering all of Magnamund, also illustrated by Francesco Mattioli and sold by Cubicle 7.
Project Aon has been granted permission to host the following samples of the Maps of Magnamund collection and the World of Magnamund poster map.
< Alberto Dal Lago Wallpapers | Books | Lone Wolf Originals >
| 
| |
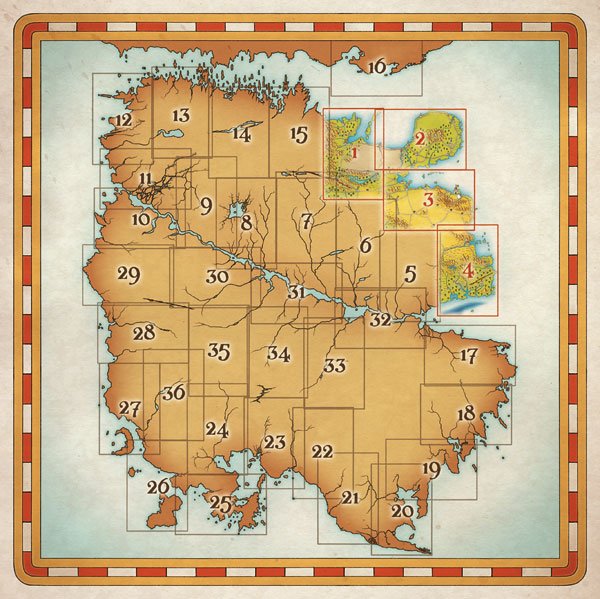
| Cover | World Grid | |
| Set 1 (pre-order) | ||
|---|---|---|

| 
| 
|
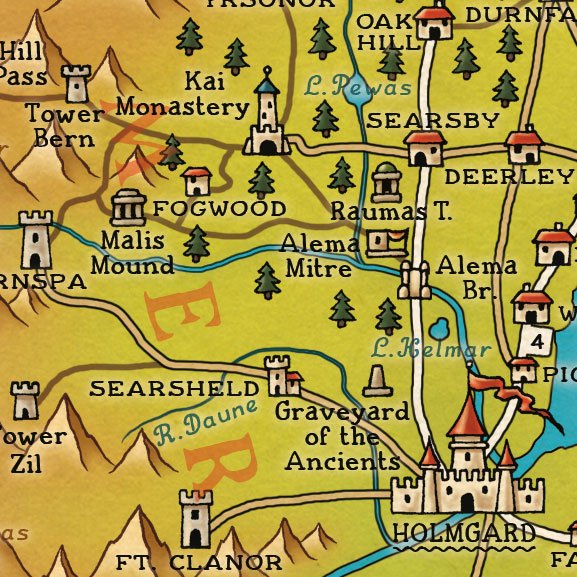
| Map 1: Sommerlund | Map 1: Back | Map 1: Detail |
| 
| 
|
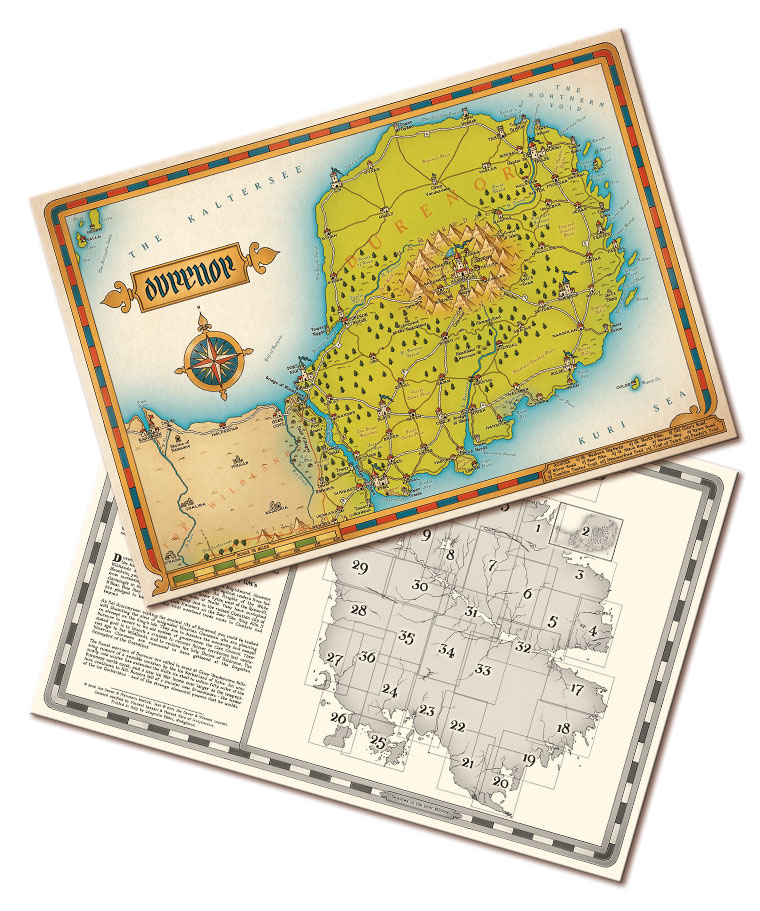
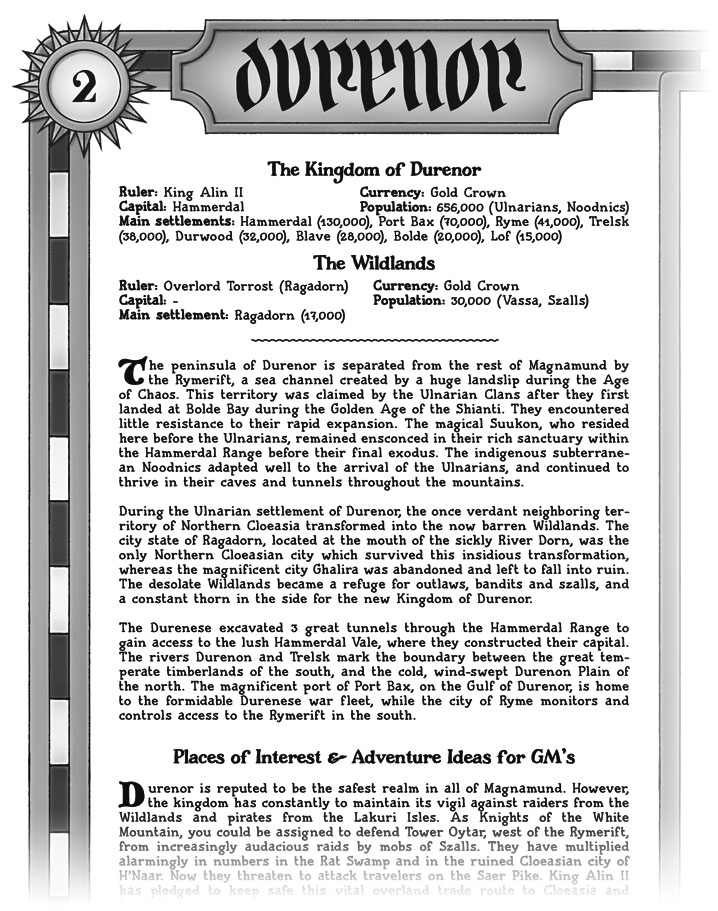
| Map 2: Durenor | Map 2: Back | Map 2: Detail |

| 
| 
|
| Map 3: Vassagonia | Map 3: Back | Map 3: Detail |
| 
| 
|
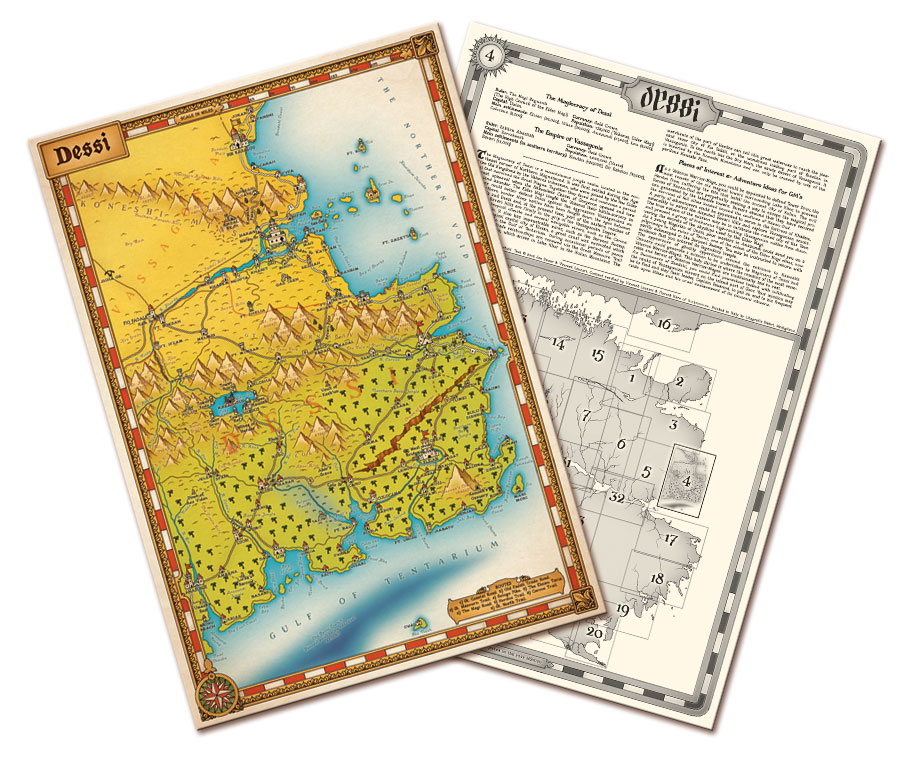
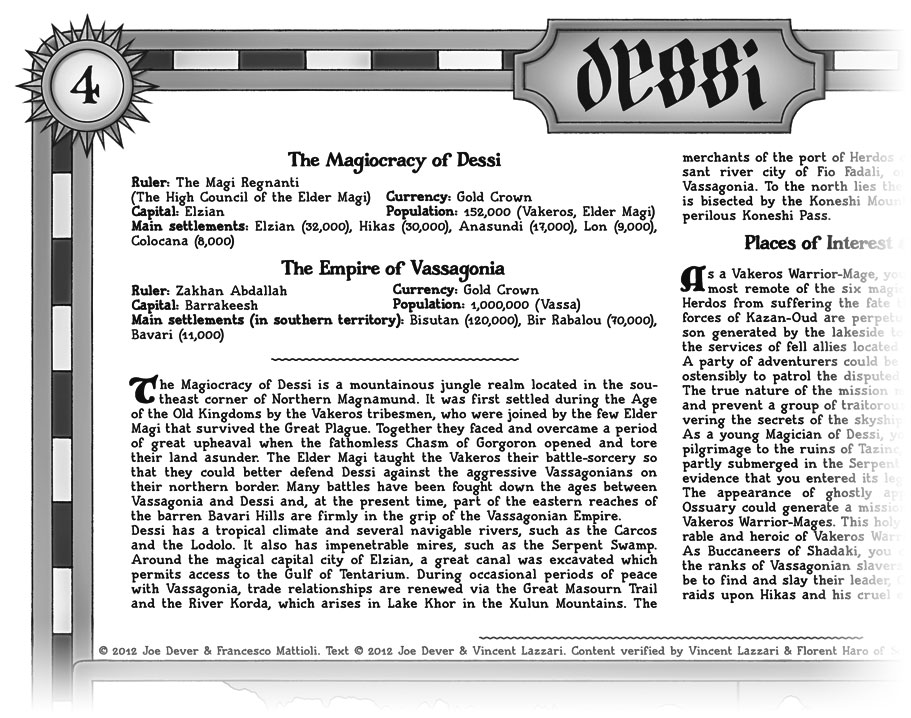
| Map 4: Dessi | Map 4: Back | Map 4: Detail |
| Set 2 (pre-order) | ||

| 
| 
|
| Map 5: Kakush & Valerion | Map 5: Back | Map 5: Detail |

| 
| 
|
| Map 6: The Galdonlands | Map 6: Back | Map 6: Detail |

| 
| 
|
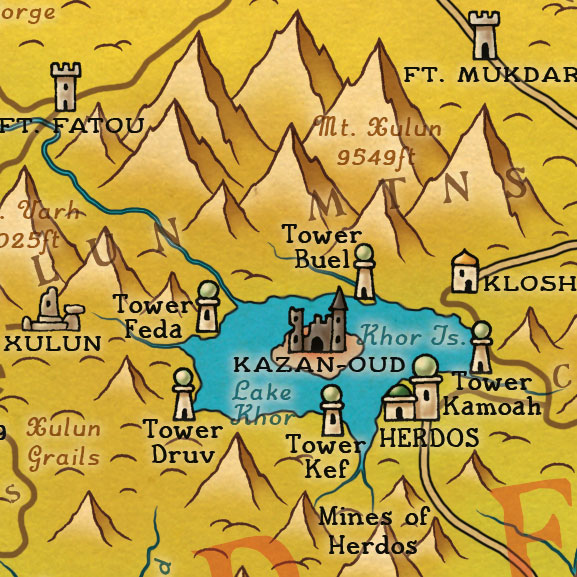
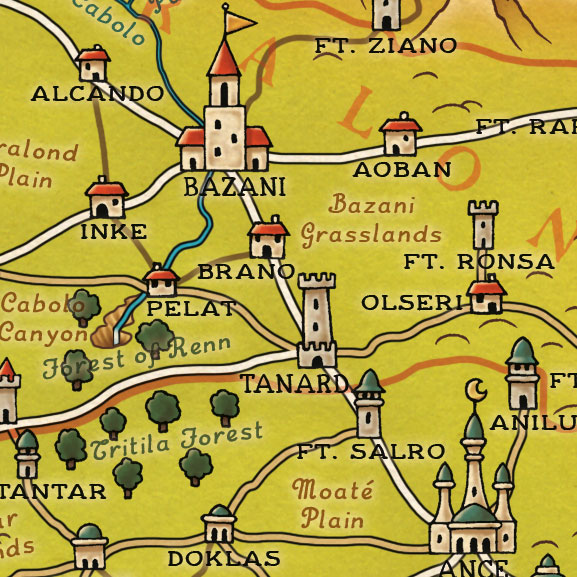
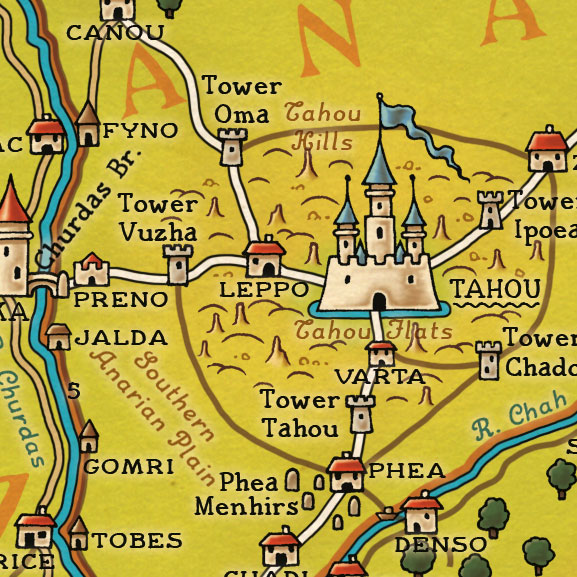
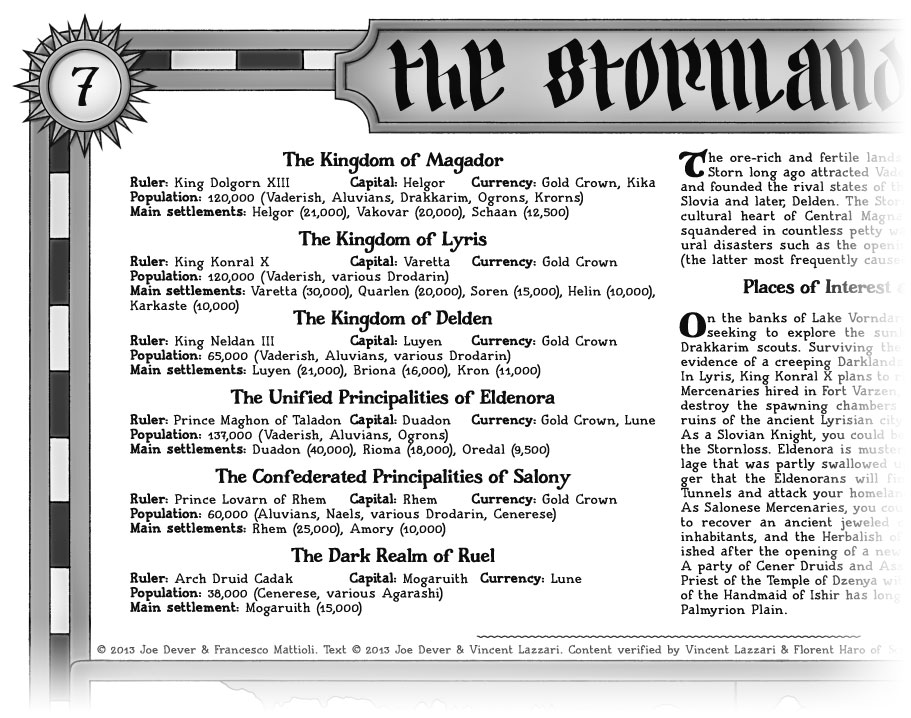
| Map 7: The Stornlands | Map 7: Back | Map 7: Detail |

| 
| 
|
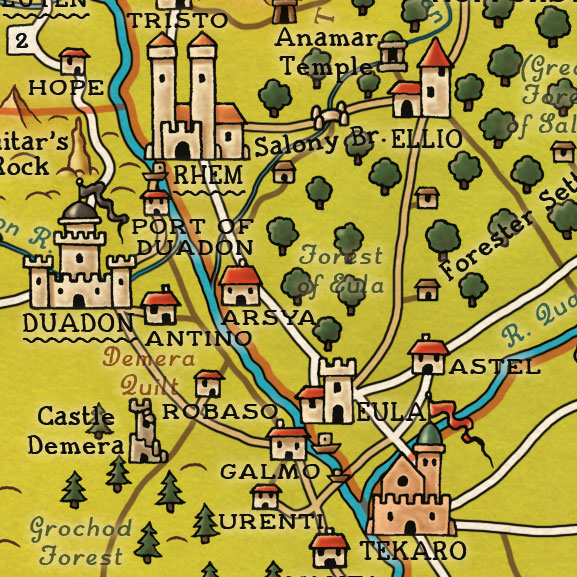
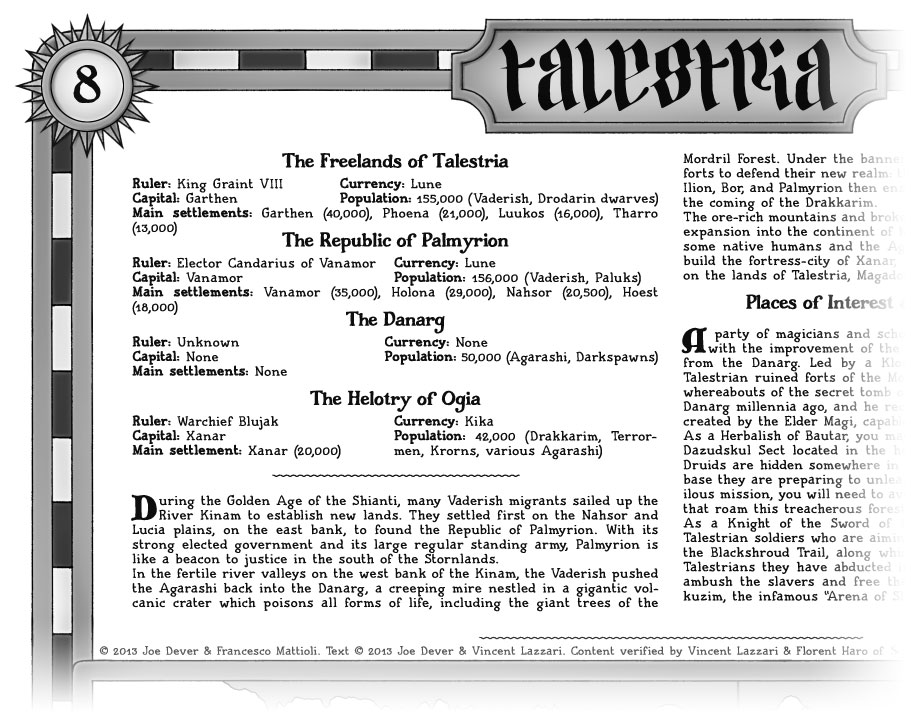
| Map 8: Talestria | Map 8: Back | Map 8: Detail |
| Set 3 (pre-order) | ||
| 
| 
|
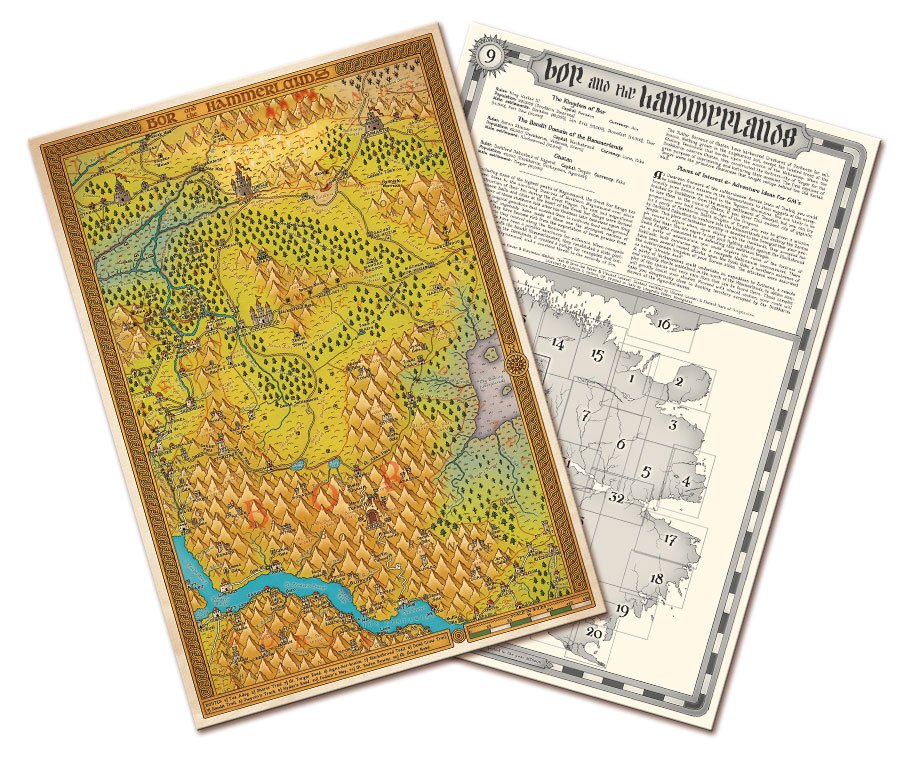
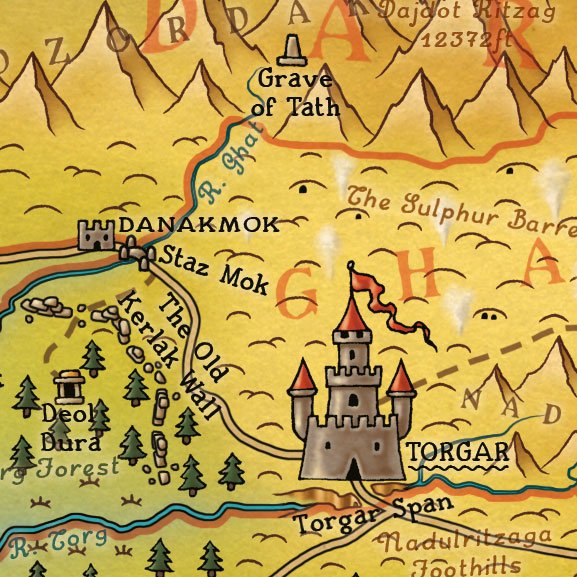
| Map 9: Bor & The Hammerlands | Map 9: Back | Map 9: Detail |

| 
| 
|
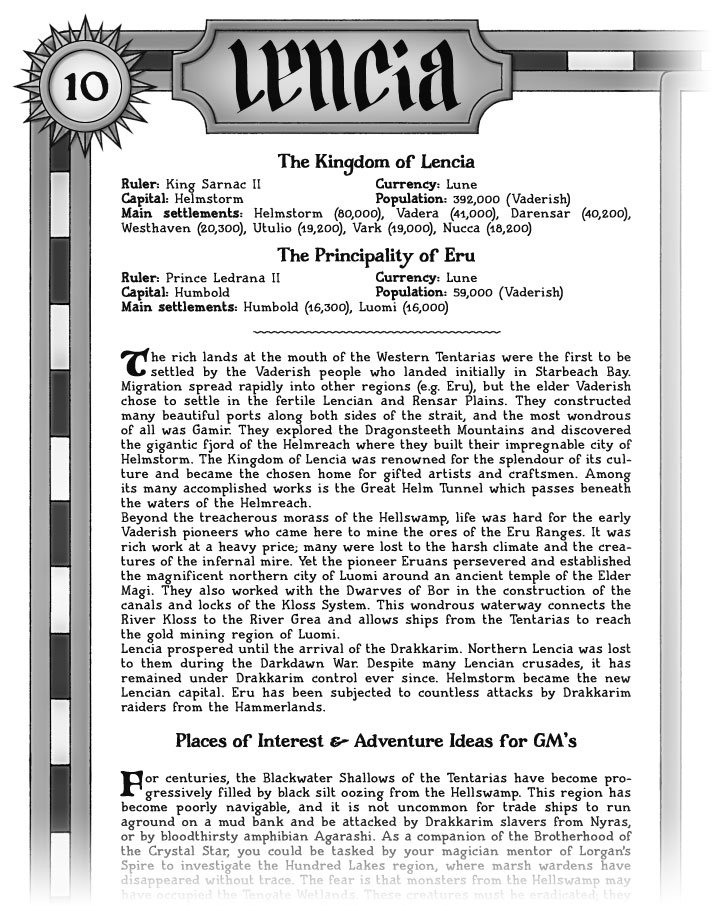
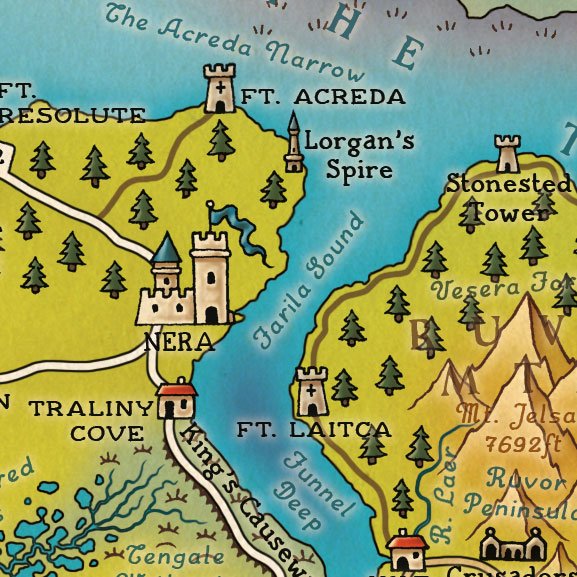
| Map 10: Lencia | Map 10: Back | Map 10: Detail |

| 
| 
|
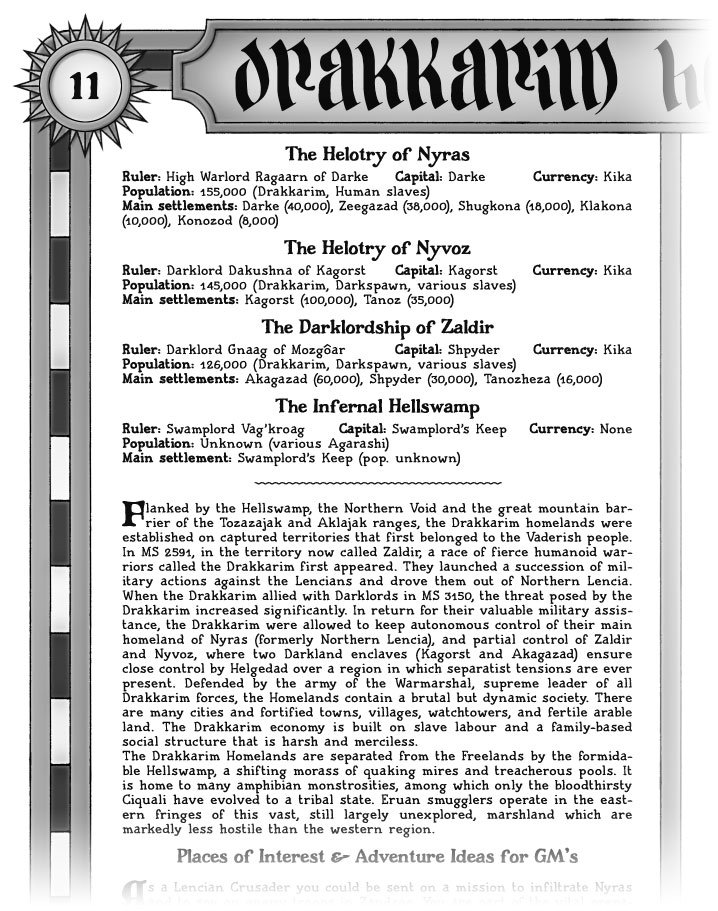
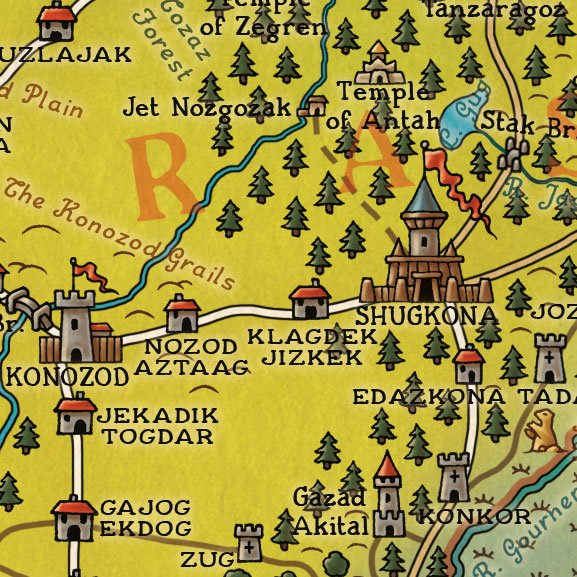
| Map 11: The Drakkarim Homelands & The Hellswamp | Map 11: Back | Map 11: Detail |
| 
| 
|
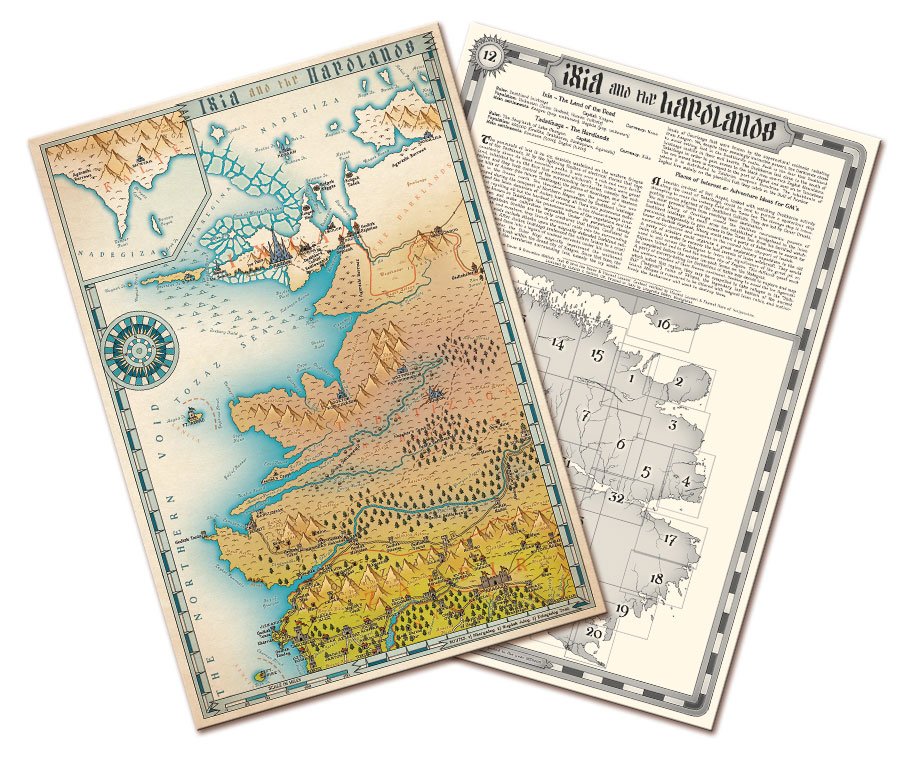
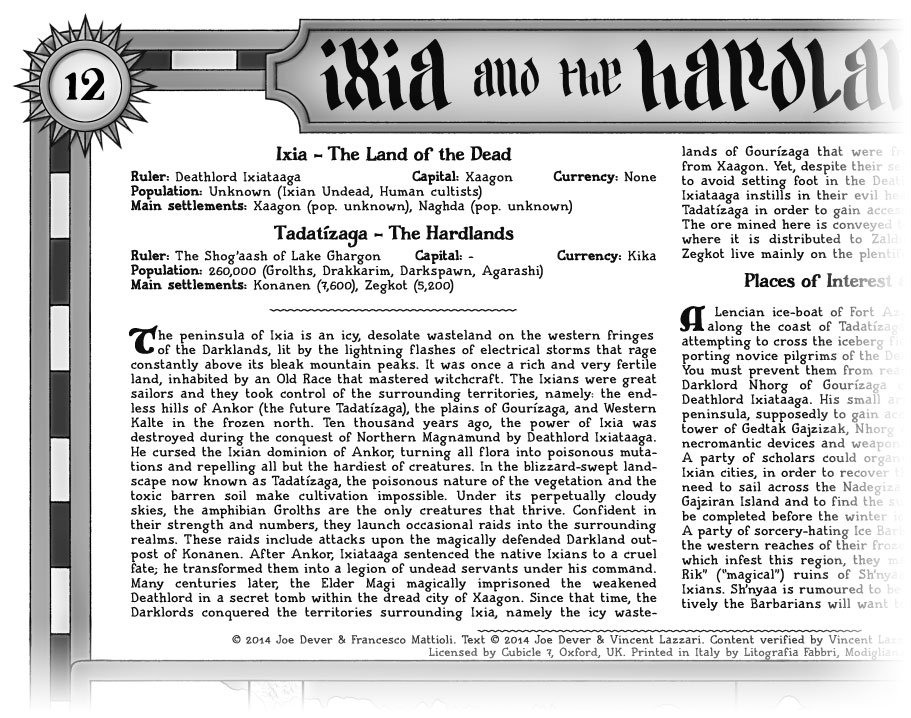
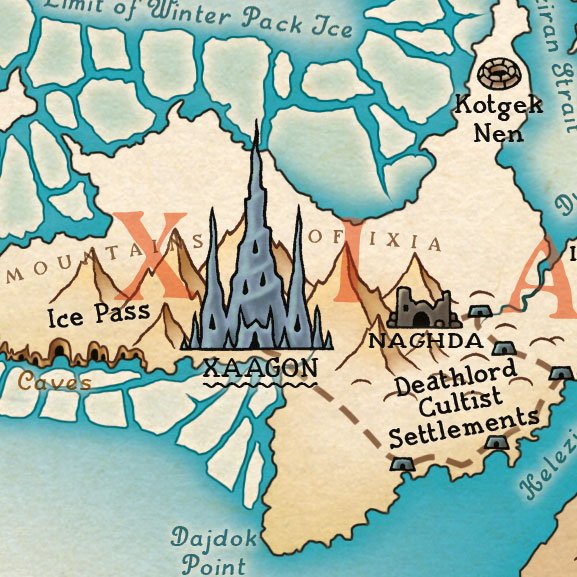
| Map 12: Ixia & The Hardlands | Map 12: Back | Map 12: Detail |
| Set 4 | ||

| 
| 
|
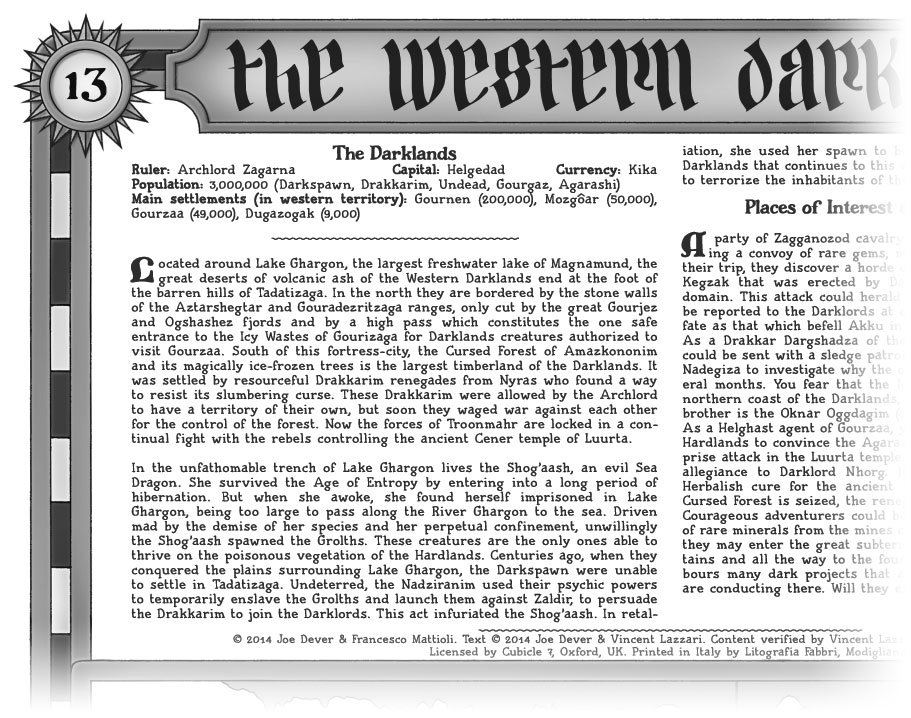
| Map 13: Western Darklands | Map 13: Back | Map 13: Detail |
| 
| 
|
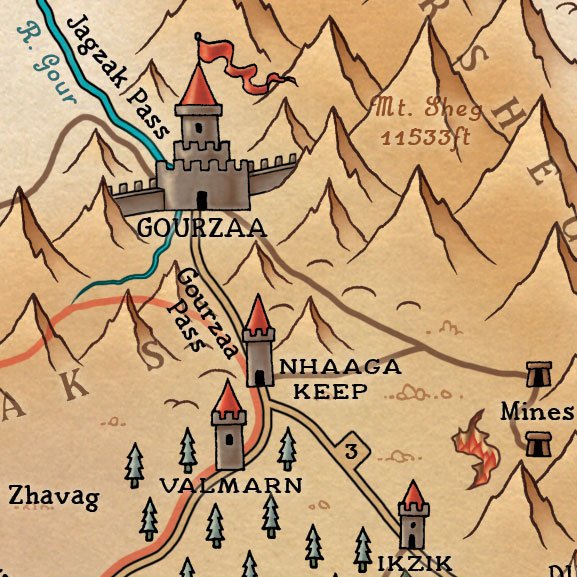
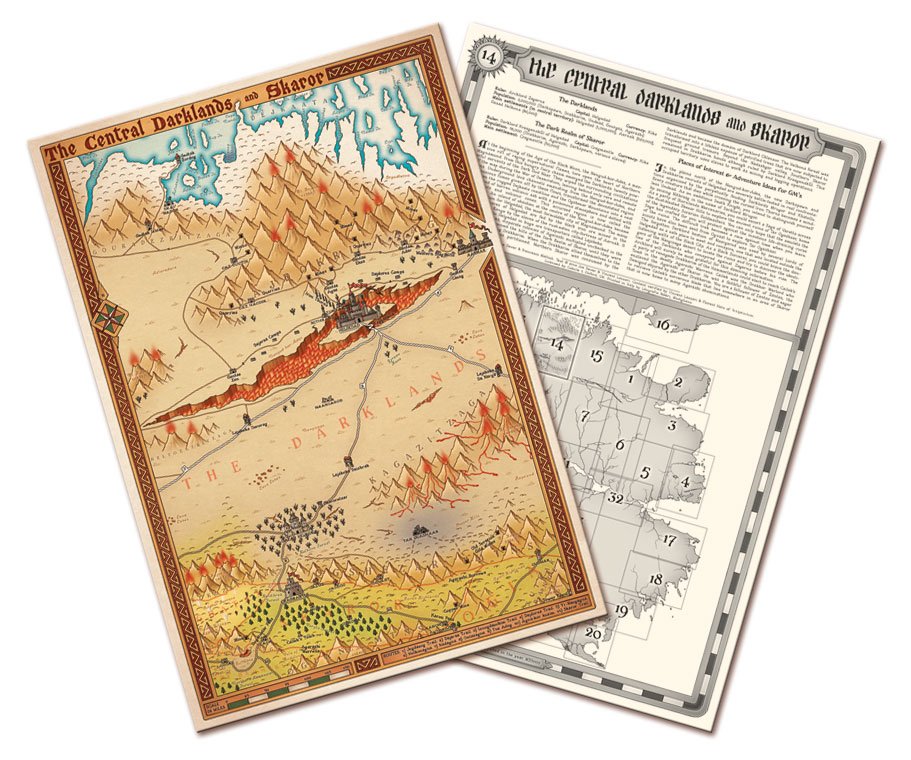
| Map 14: Central Darklands | Map 14: Back | Map 14: Detail |

| 
| 
|
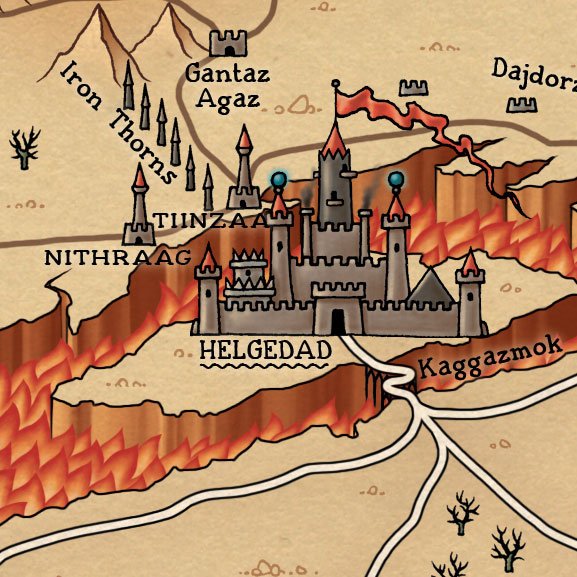
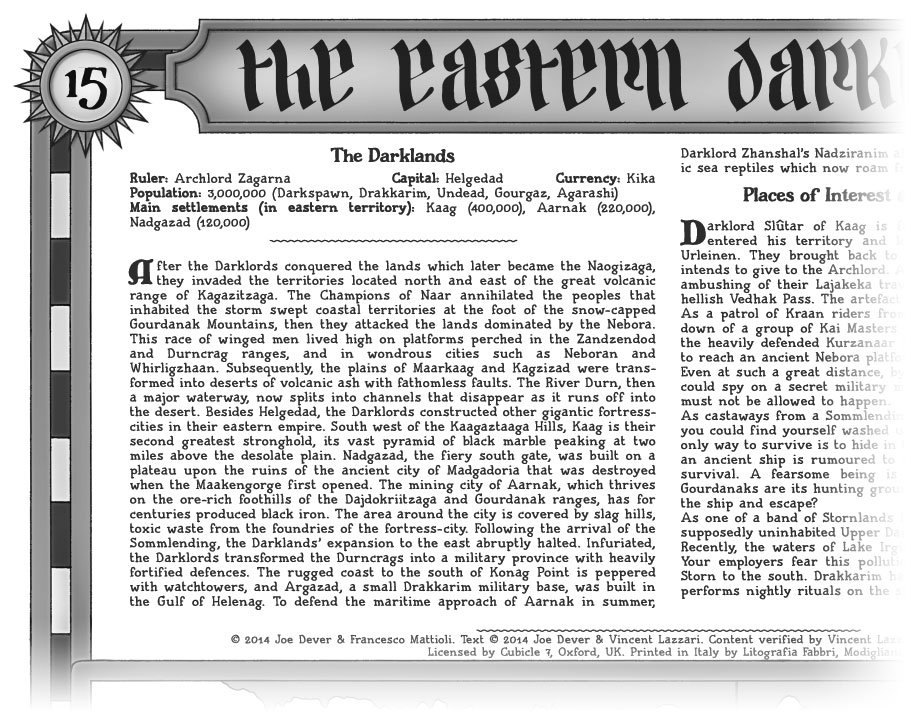
| Map 15: Eastern Darklands | Map 15: Back | Map 15: Detail |

| 
| 
|
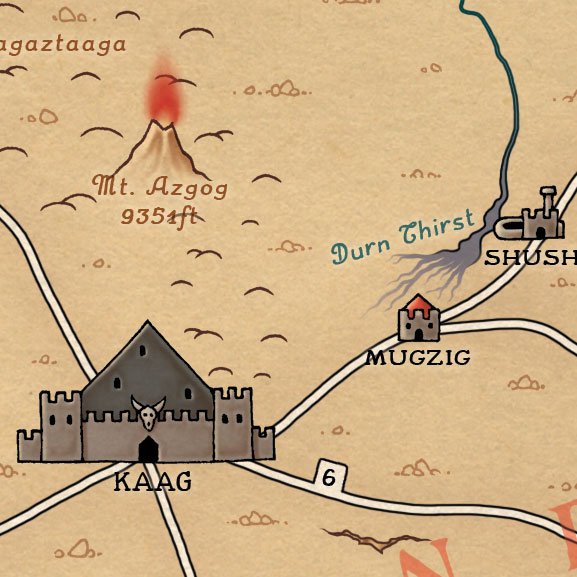
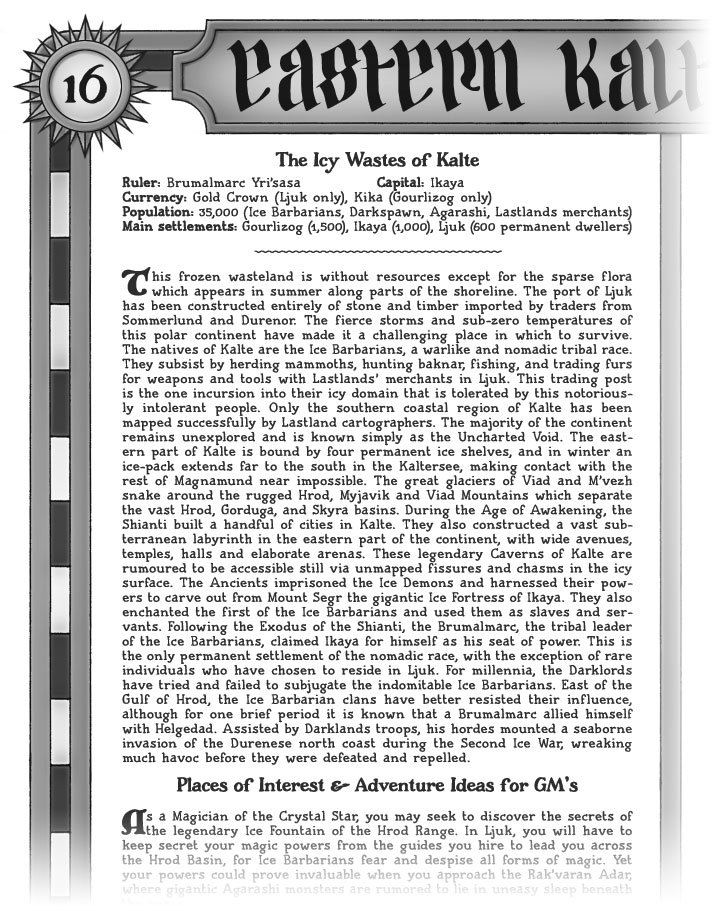
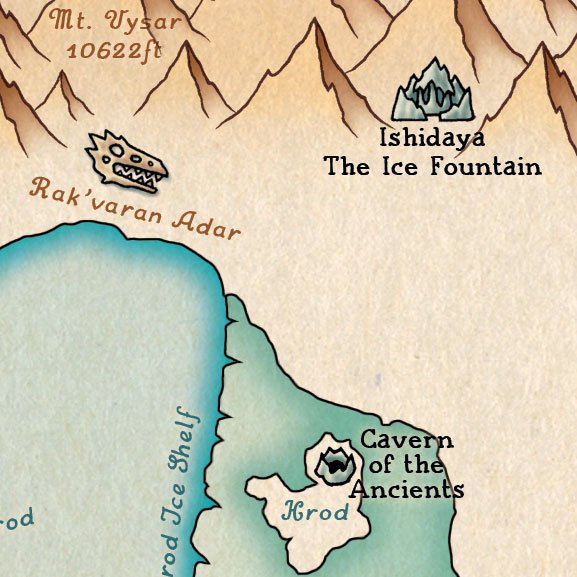
| Map 16: Eastern Kalte | Map 16: Back | Map 16: Detail |
| Set 5 | ||
| 
| 
|
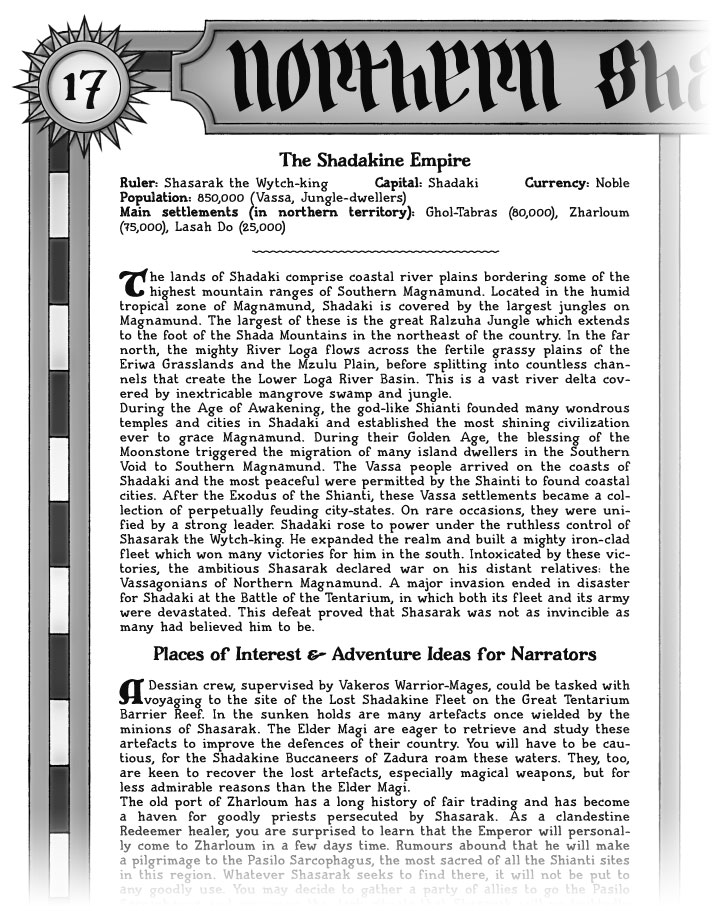
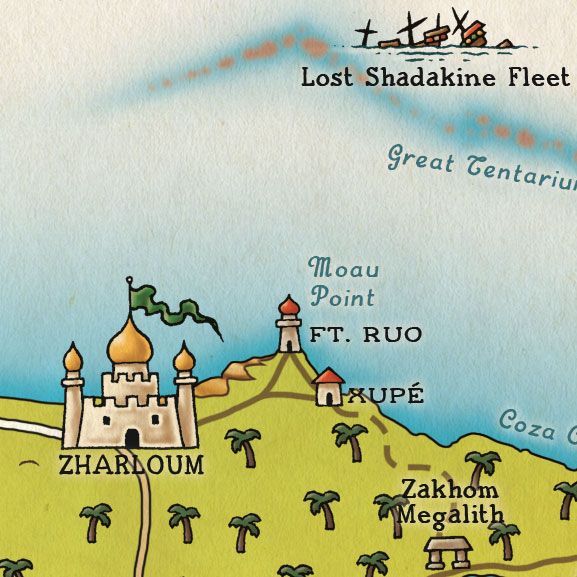
| Map 17: Northern Shadaki | Map 17: Back | Map 17: Detail |

| 
| 
|
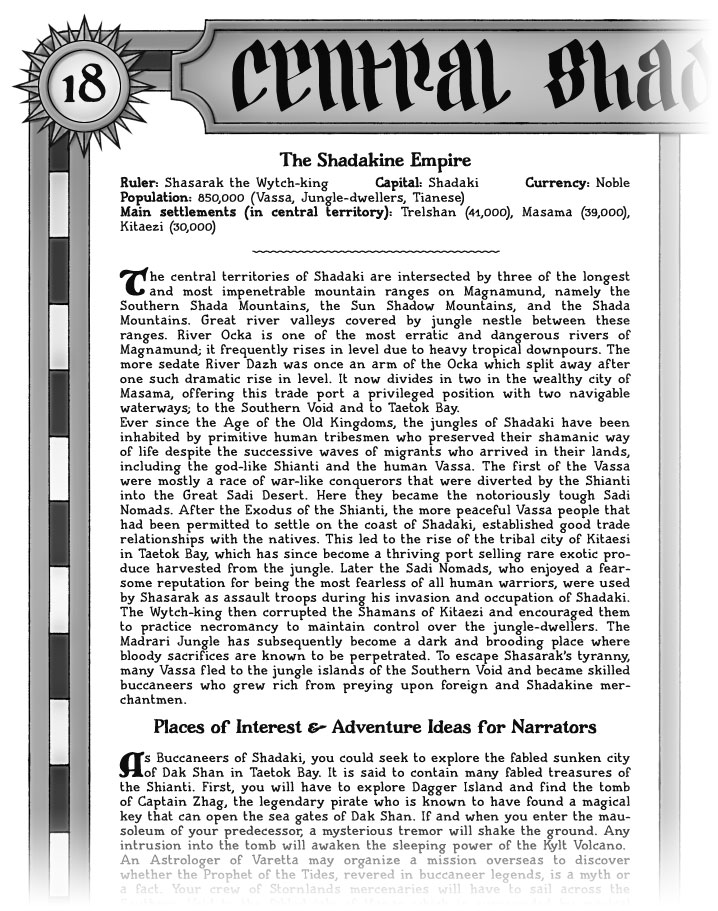
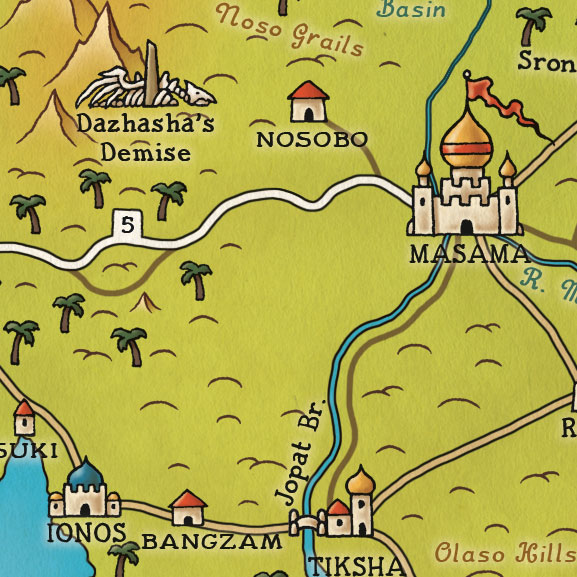
| Map 18: Central Skadaki | Map 18: Back | Map 18: Detail |

| 
| 
|
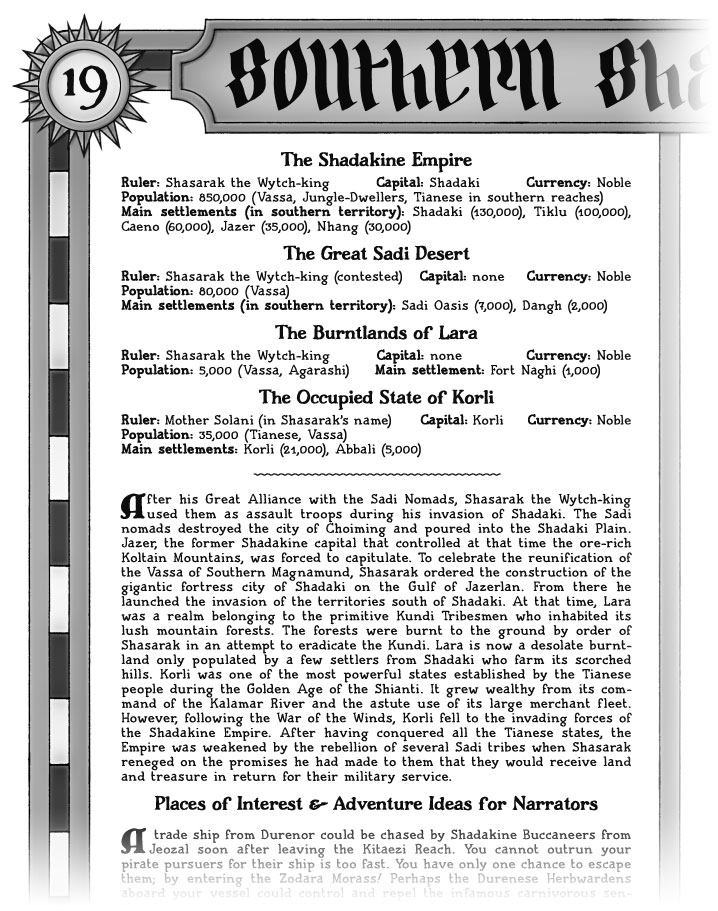
| Map 19: Southern Shadaki | Map 19: Back | Map 19: Detail |

| 
| 
|
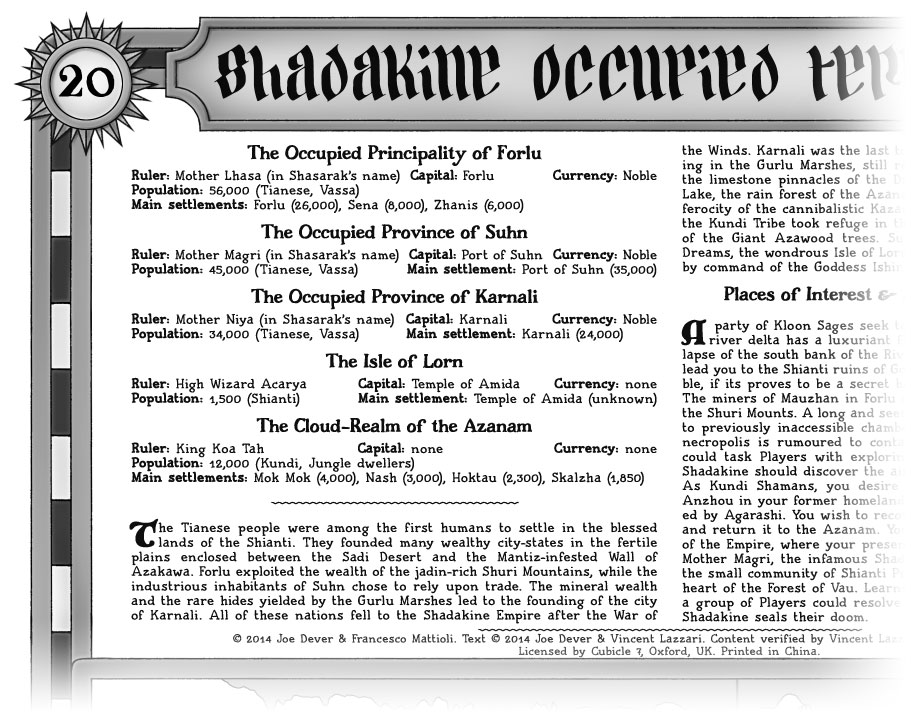
| Map 20: Shadakine Occupied Territories | Map 20: Back | Map 20: Detail |
| Set 6 | ||

| 
| 
|
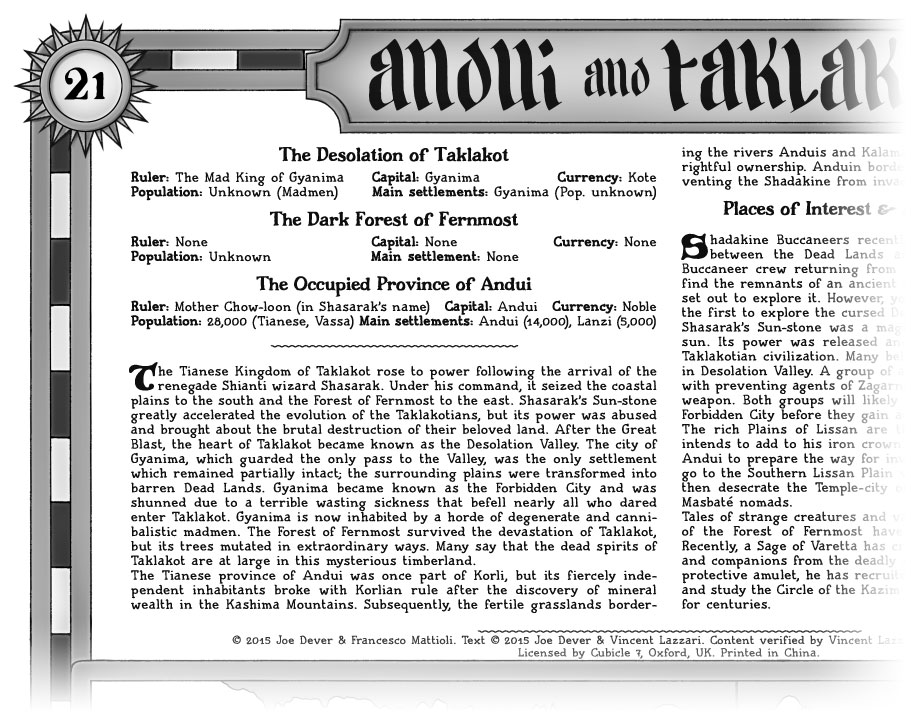
| Map 21: Taklakot & Andui | Map 21: Back | Map 21: Detail |
| 
| 
|
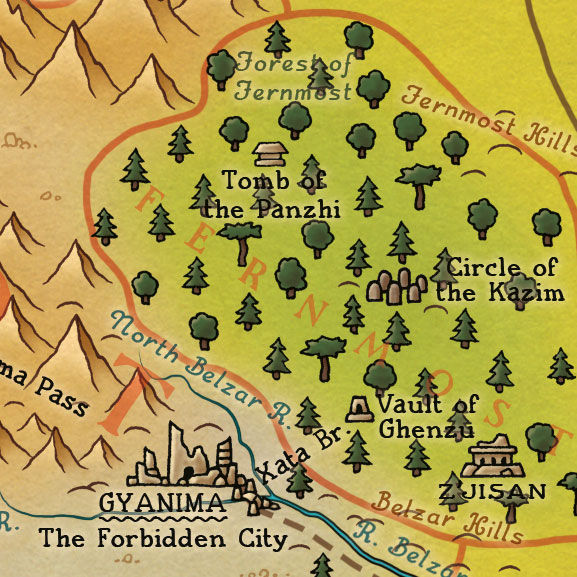
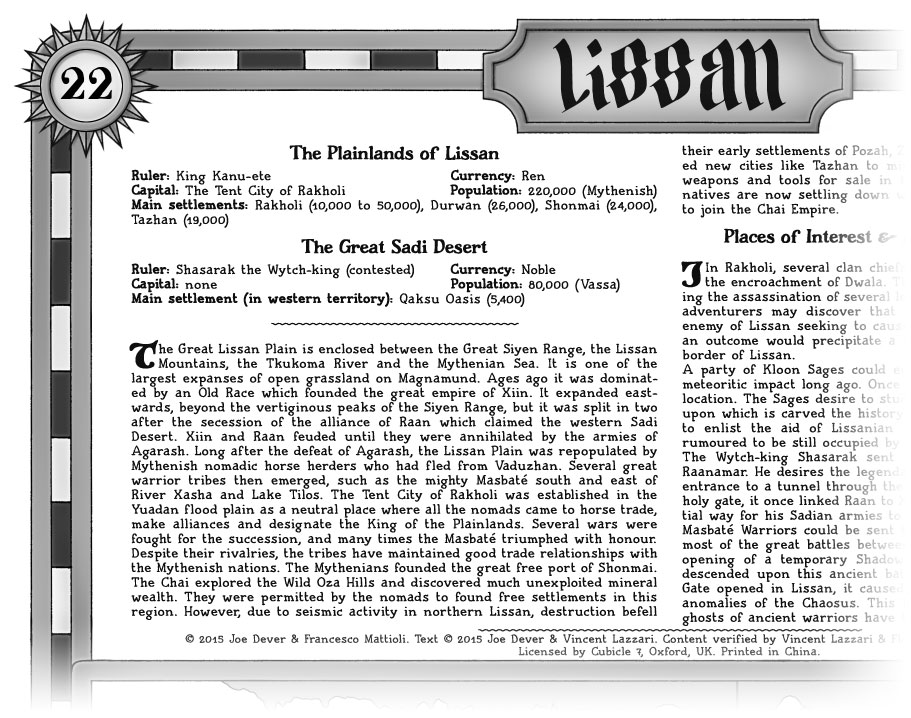
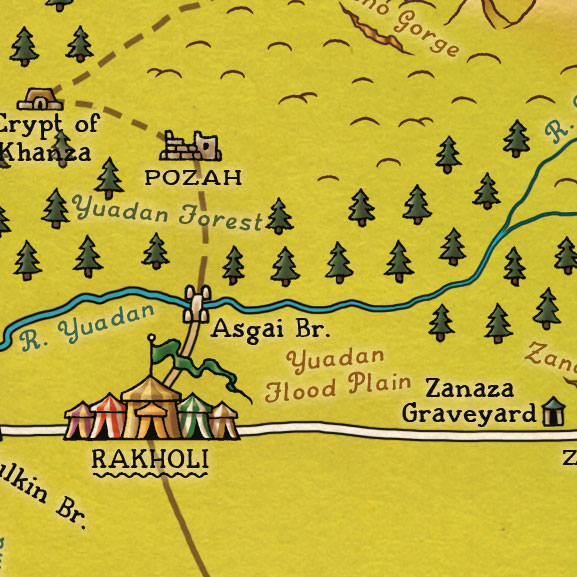
| Map 22: Lissan | Map 22: Back | Map 22: Detail |

| 
| 
|
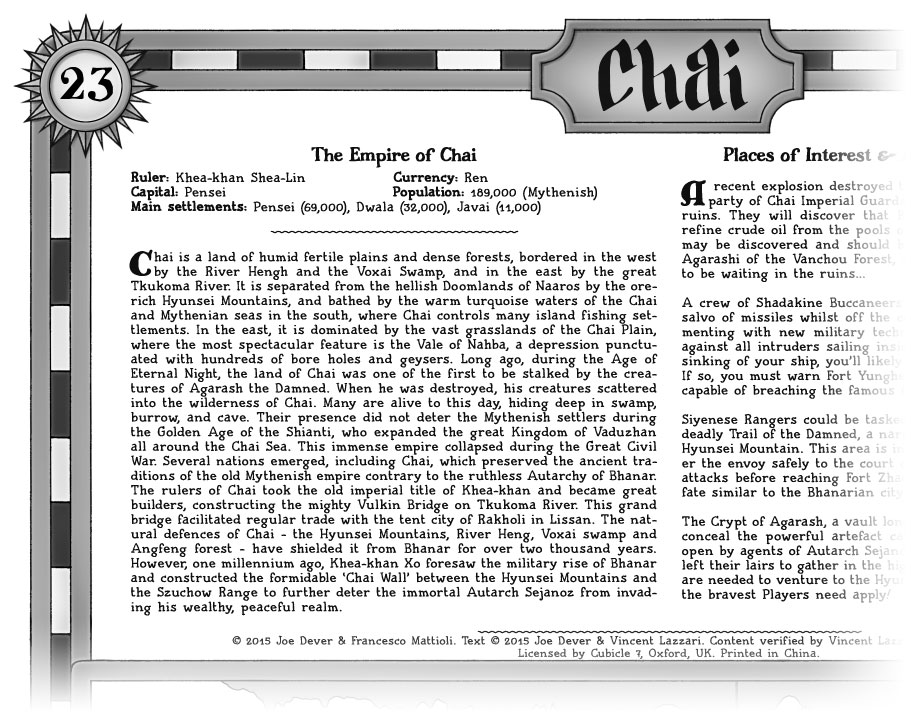
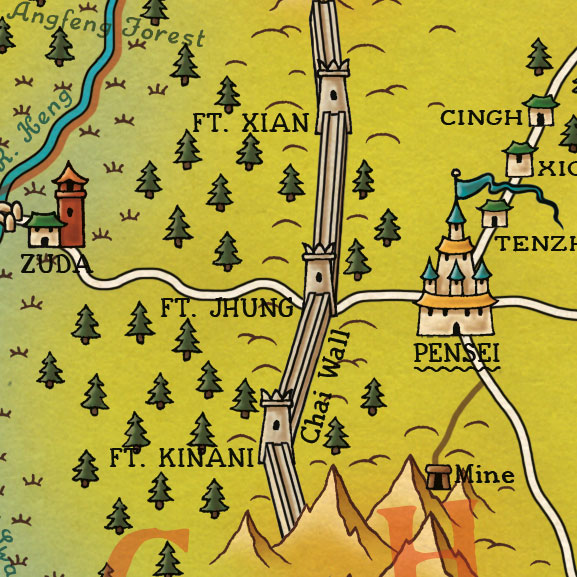
| Map 23: Chai | Map 23: Back | Map 23: Detail |

| 
| 
|
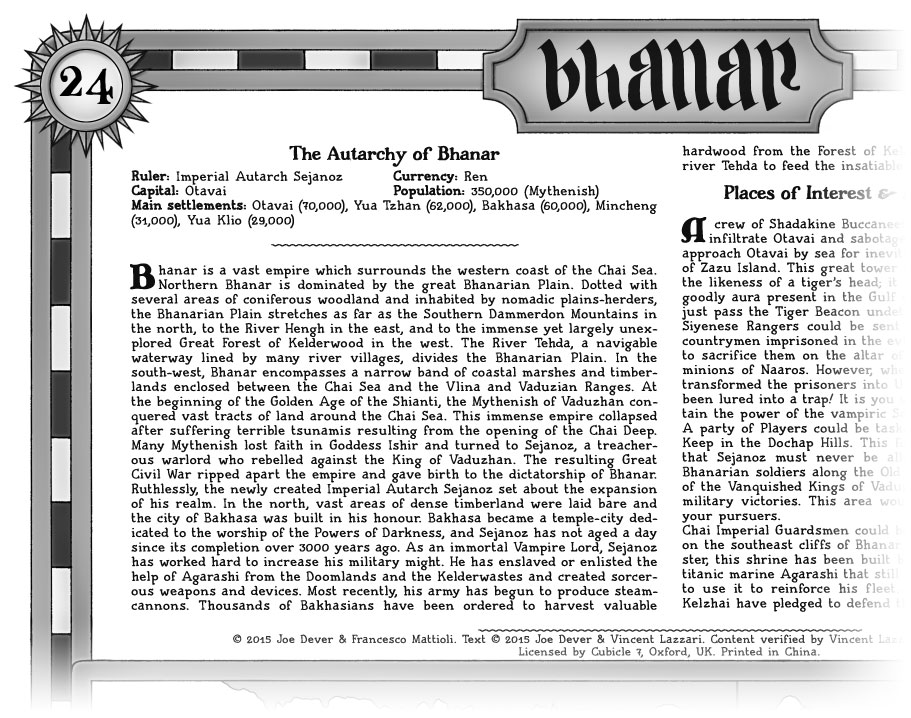
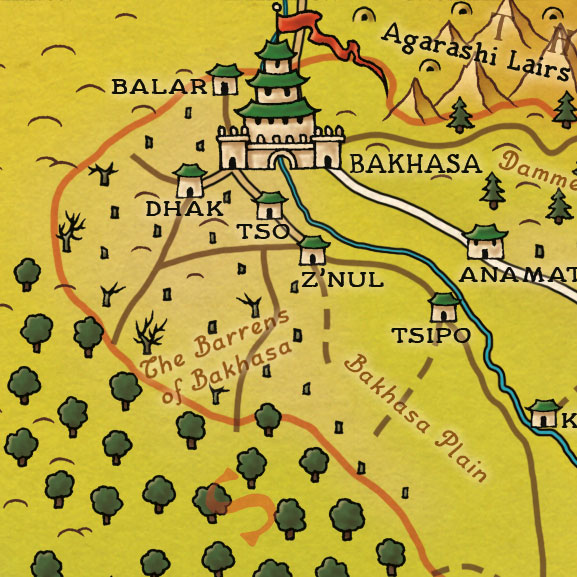
| Map 24: Bhanar | Map 24: Back | Map 24: Detail |
| Set 7 | ||
| 
| 
|
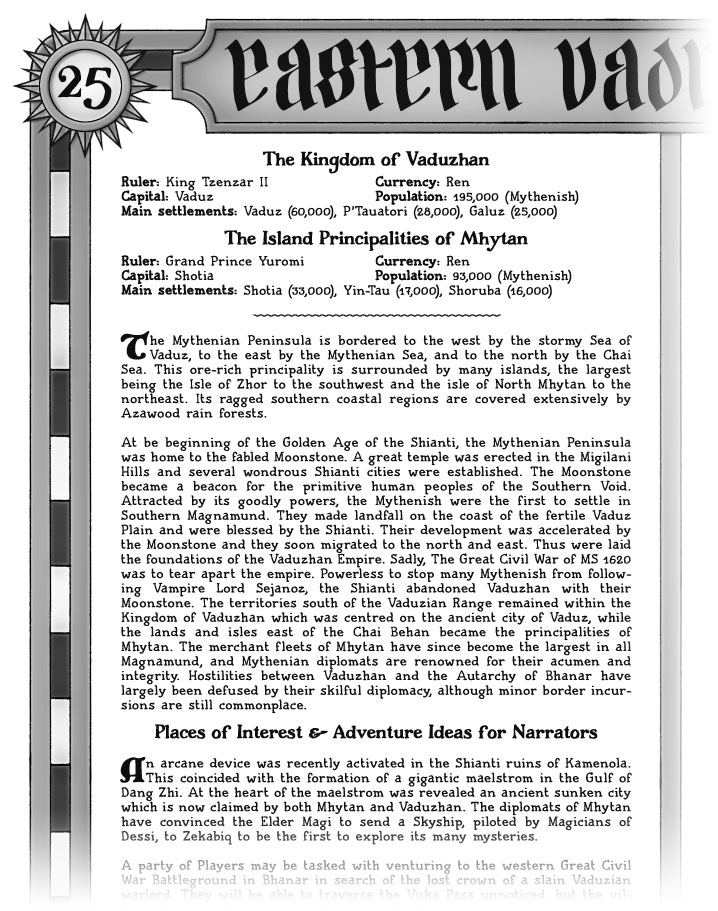
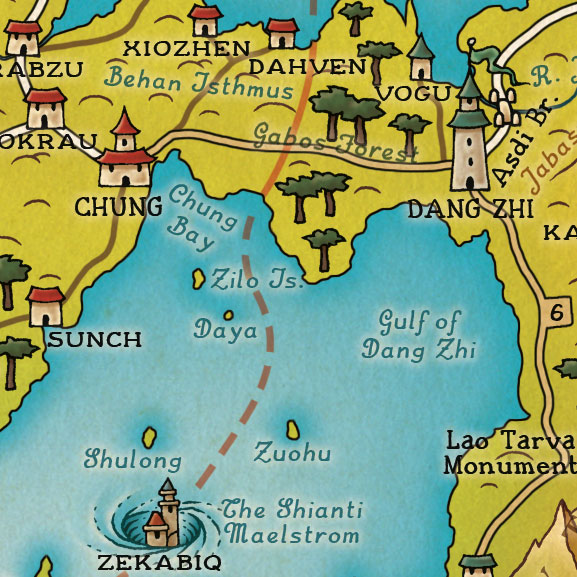
| Map 25: Eastern Vaduzhan & Mythan | Map 25: Back | Map 25: Detail |
| 
| 
|
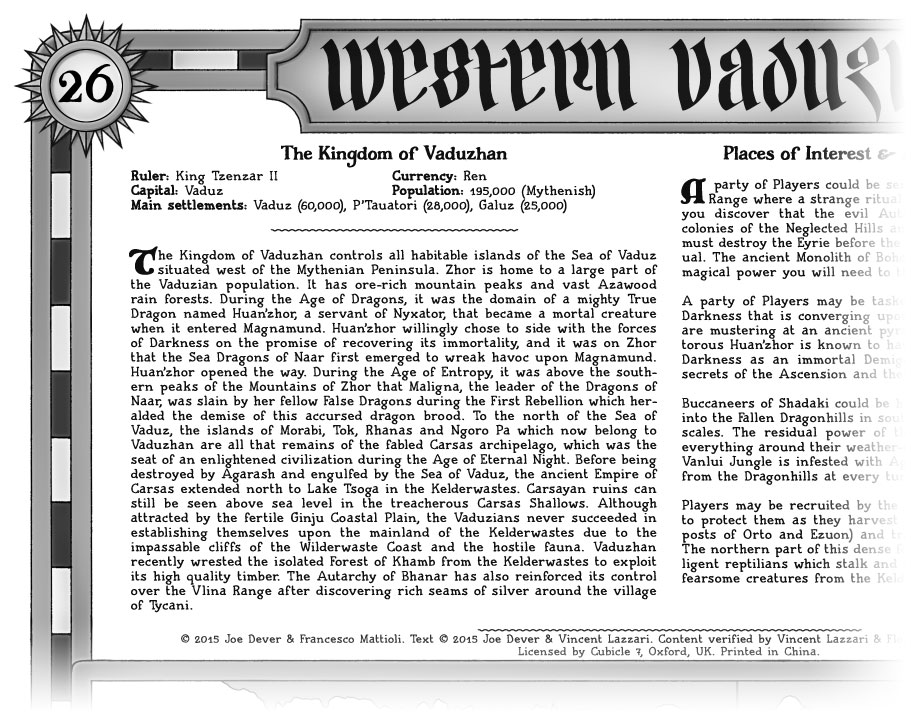
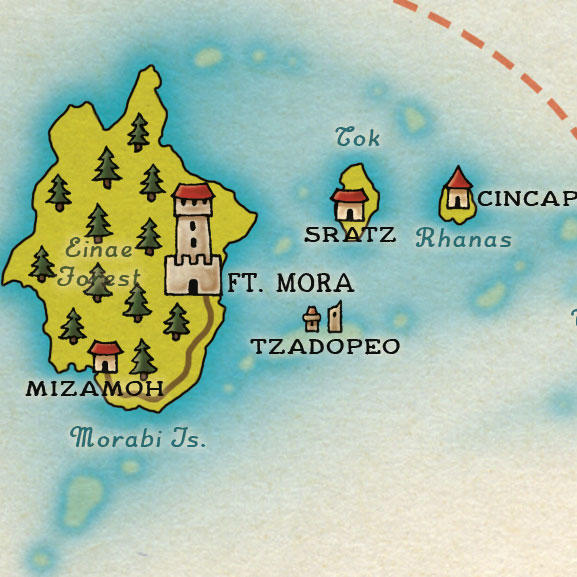
| Map 26: Western Vaduzhan | Map 26: Back | Map 26: Detail |

| 
| 
|
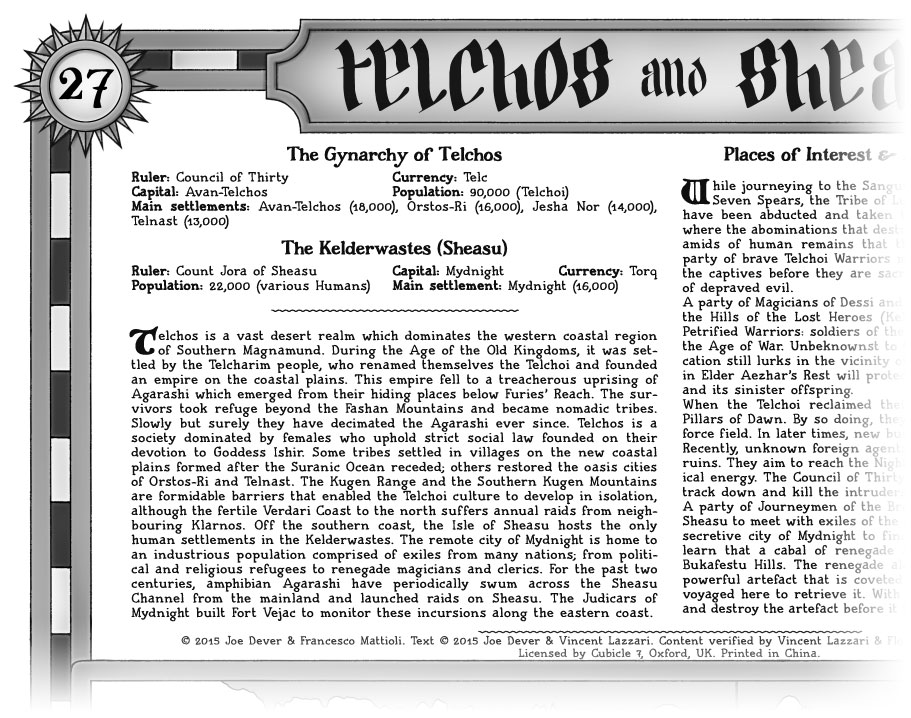
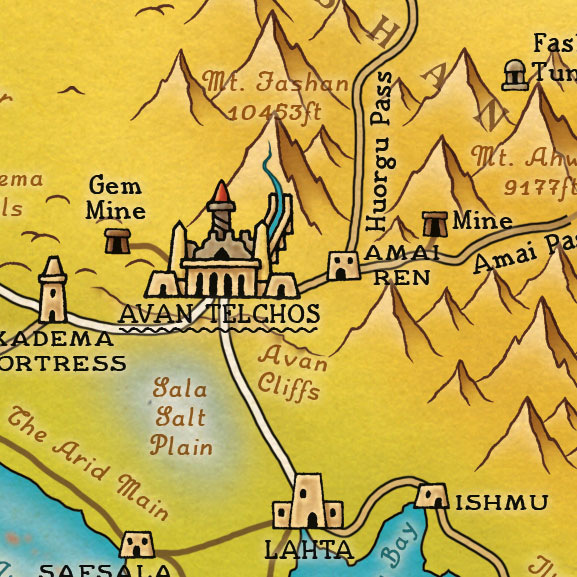
| Map 27: Telchos | Map 27: Back | Map 27: Detail |
| 
| 
|
| Map 28: Cincoria & Klanos | Map 28: Back | Map 28: Detail |
| Set 8 (forthcoming) | ||
| Map 29: Kasland | ||
| Map 30: Starn, Boden & Ilion | ||
| Map 31: Central Tentarias | ||
| Map 32: Midsea & Eastern Tentarias | ||
| Set 9 (forthcoming) | ||
| Map 33: Siyen | ||
| Map 34: Lunarlia, Siyen & Naaros | ||
| Map 35: Kaum, Halia & Lunarlia | ||
| Map 36: Southern Lunaria & The Kelderwastes | ||
| Set 10 — Bonus Maps (forthcoming) | ||
| Map 37: Northern Sadi Desert | ||
| Map 38: Southern Sadi Desert | ||
| Map 39: Southern Kalte & Northern Darklands | ||
| Map 40: Southeastern Kalte & Northeastern Darklands | ||
| The World of Magnamund Poster Map (pre-order) | ||
| ||
| Cover | ||